Stripe
This guide explains the integration steps required to automatically synchronize invoices created in Stripe with the Docnova Portal. Once the integration is completed, billing and financial data can be tracked more efficiently from a single platform.
Before you begin, make sure that you have access permission for your Stripe account and permission to view integration settings in your Docnova Portal account.
Note: Before creating the invoice, the accuracy of the invoice information pulled from Stripe and the selected Invoice Type should be checked.
Integration Steps
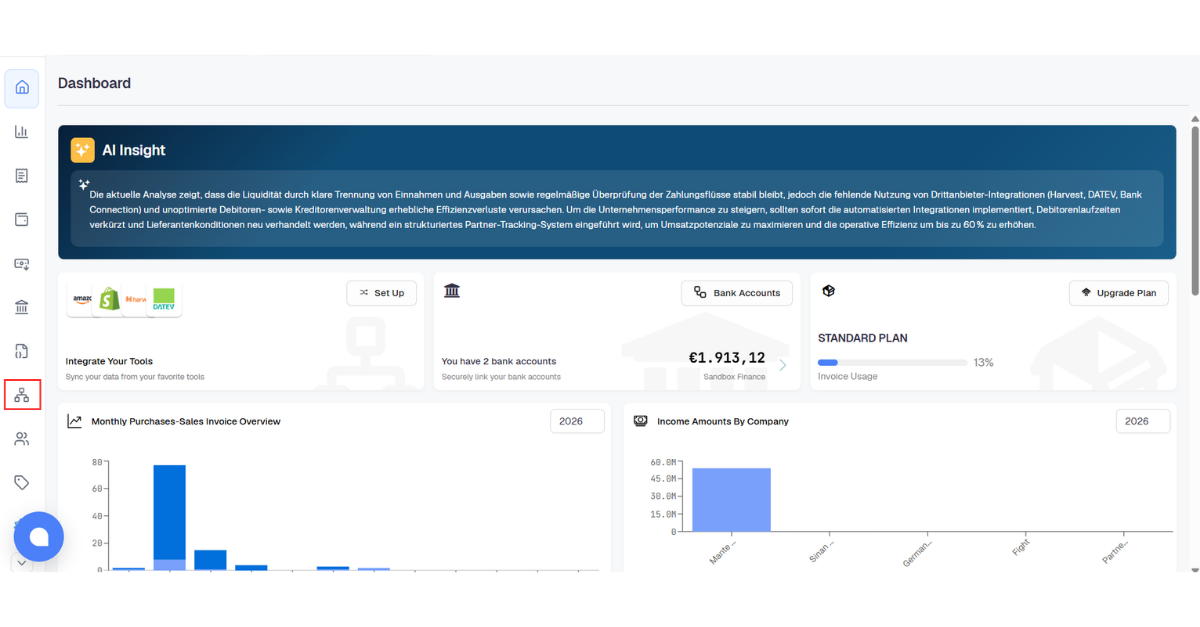
Step 1: Access the Integrations Menu
On the Docnova Portal home page, click the Integrations icon in the menu on the left side.
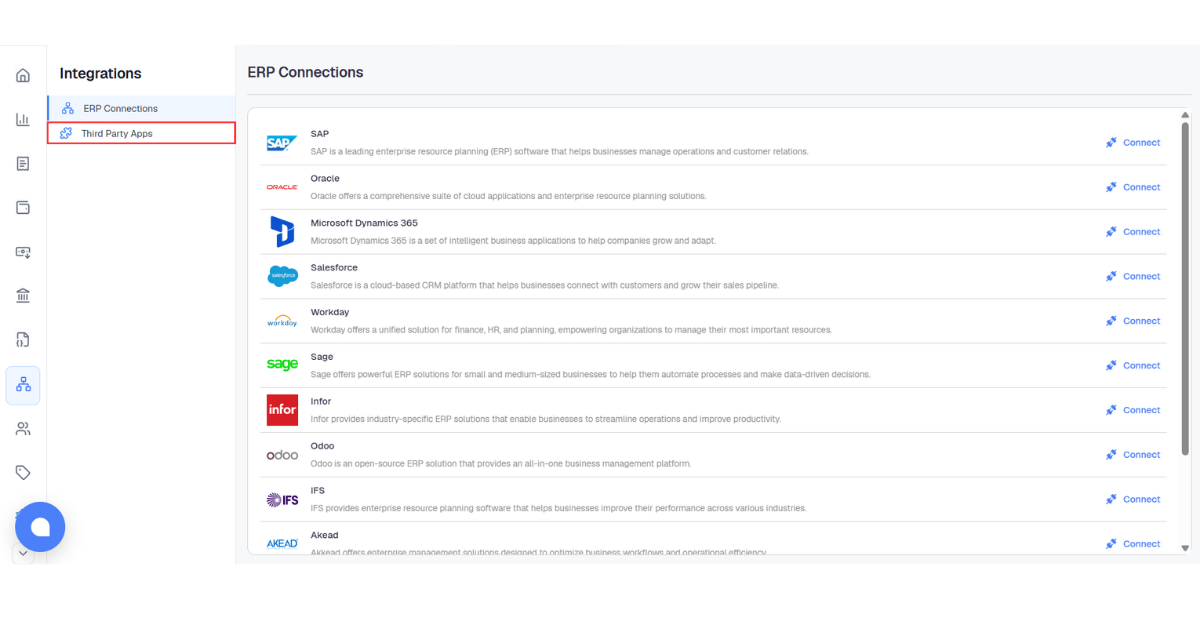
Step 2: Open the Third-party Apps Section
Select the Third-party Apps section under the Integrations menu.
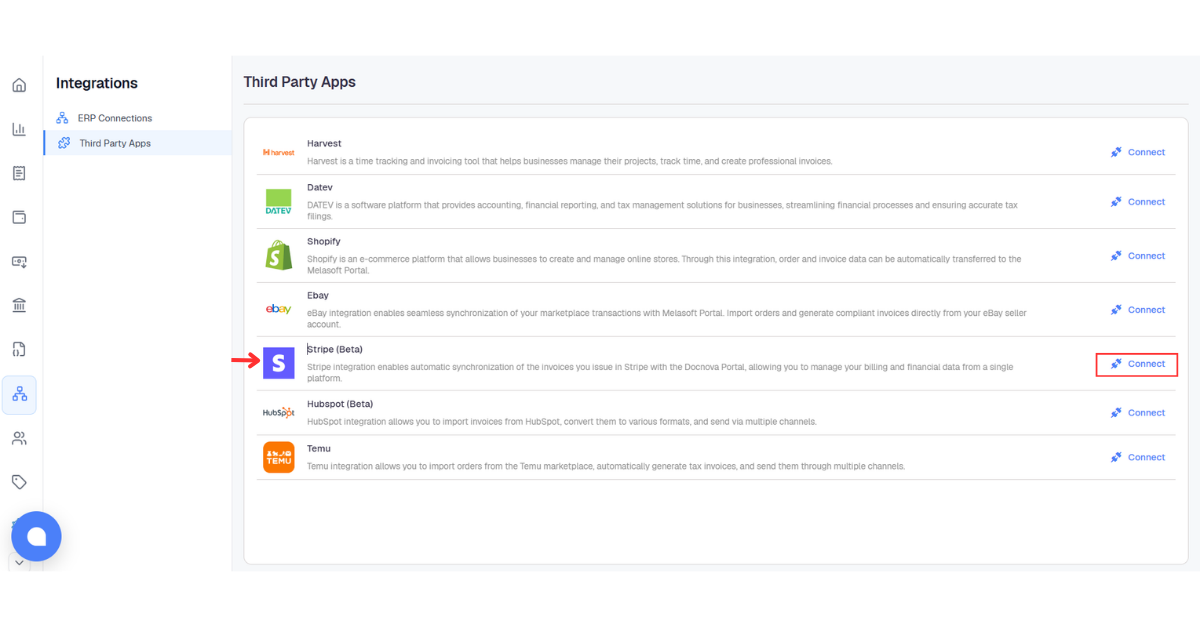
Step 3: Start the Stripe Connection
On the page that opens, find the Stripe row in the application list and click the related Connect button.
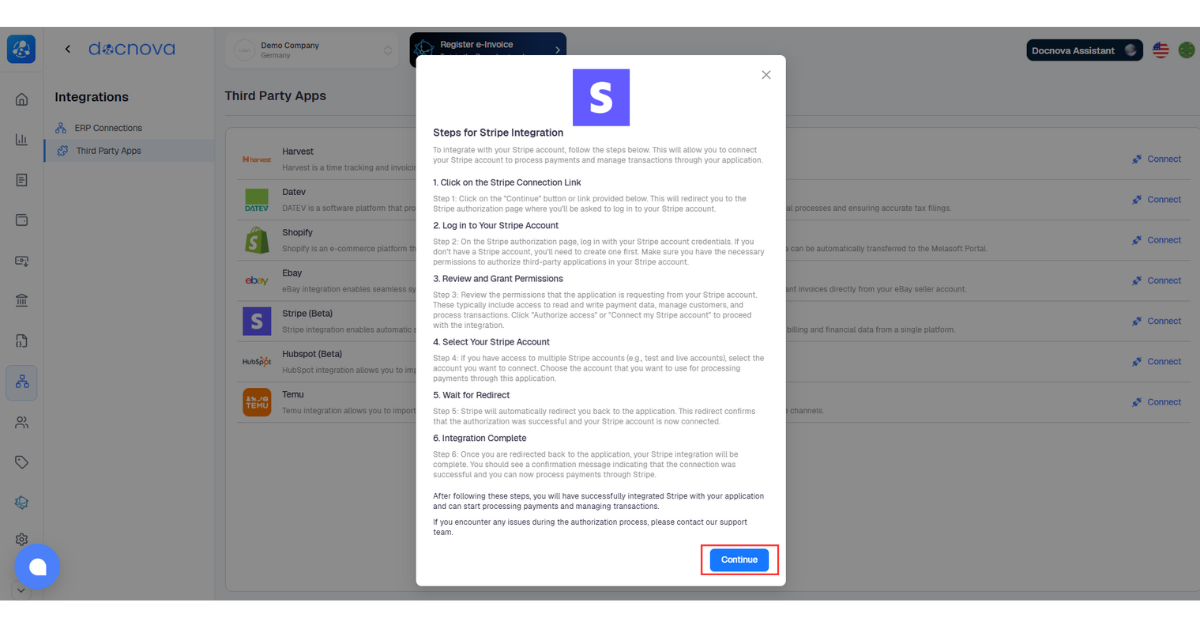
Step 4: Confirm the Stripe Integration Steps
Carefully read the instructions in the pop-up window titled Steps for Stripe Integrations. Click the Connect button to continue.
Step 5: Connect with the Stripe Account
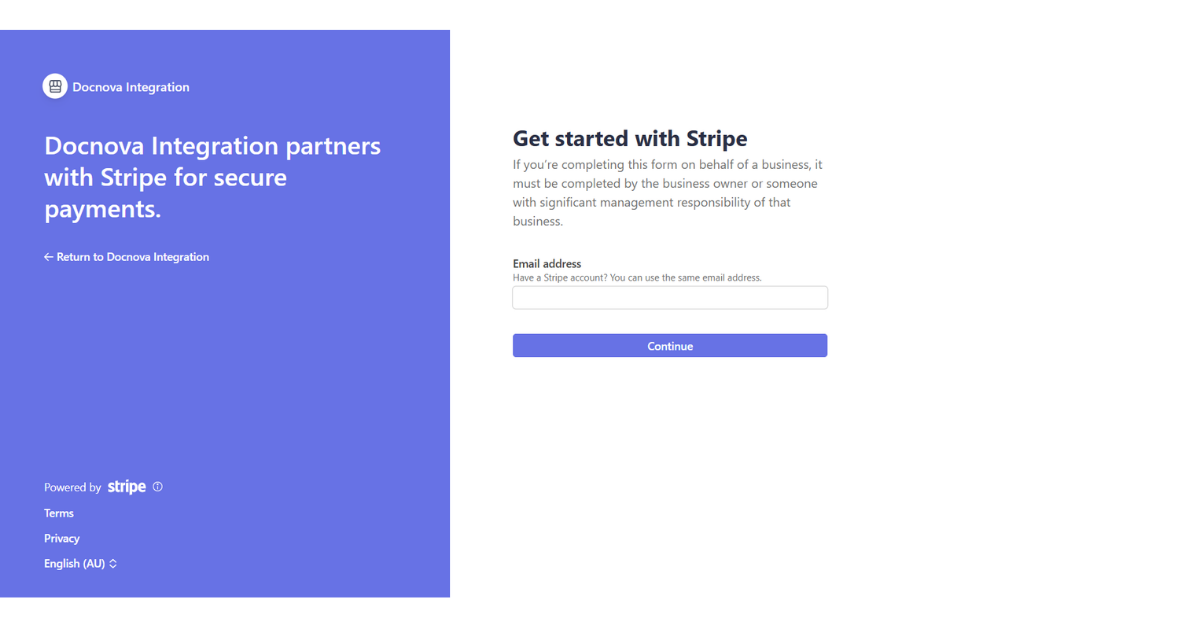
When you are redirected to the Stripe integration setup page, enter the email address used for your Stripe account in the Email field and complete the connection steps.
Step 6: Verify the Integration Result
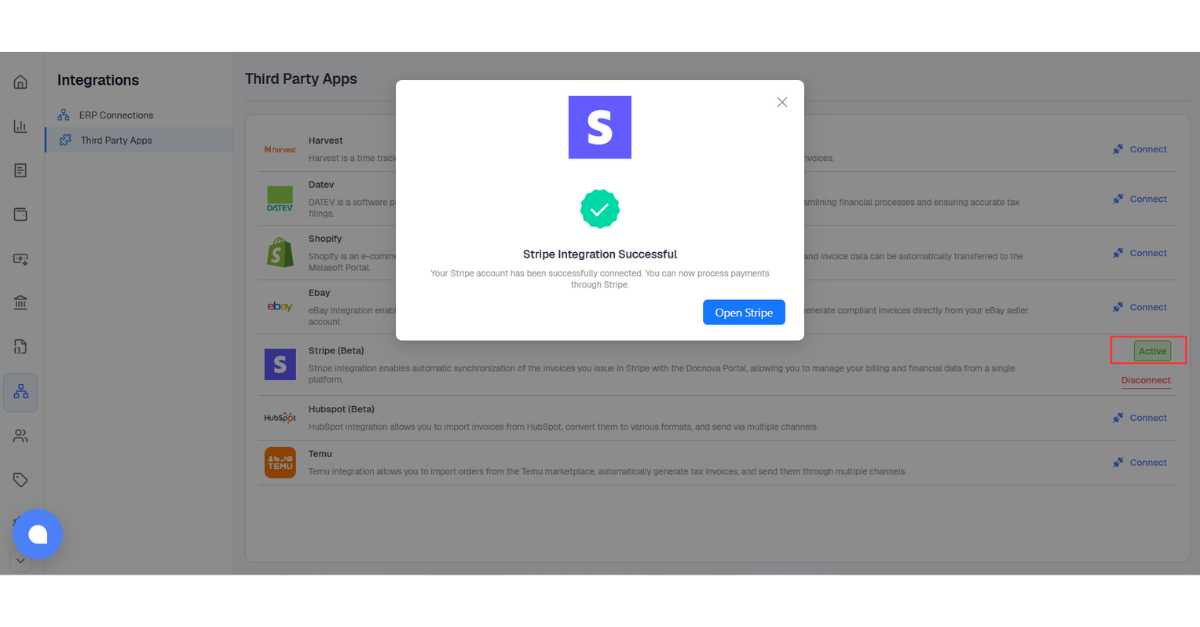
When the process is completed, you are redirected back to the Docnova Portal. Check the Stripe Integration Successful confirmation message and verify that the Stripe application status is Active.
Pulling Stripe Invoices into the Docnova Portal
Step 7: Open the Stripe Page
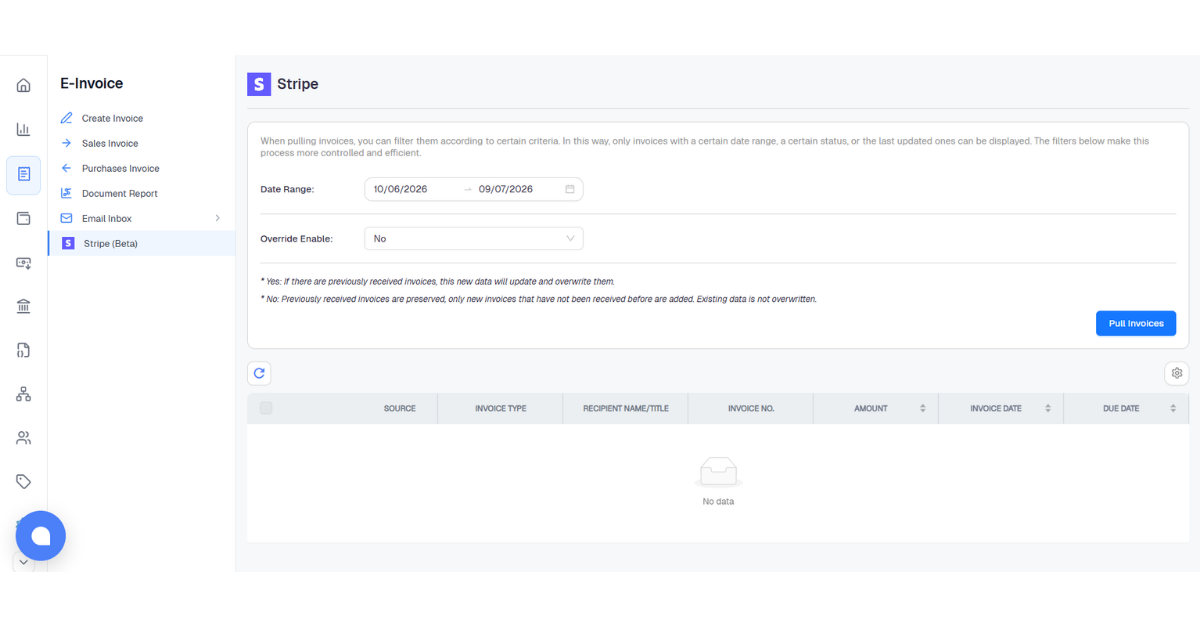
Click the Open Stripe button in the pop-up window that opens. The system redirects you to the Stripe page under the E-Invoice section.
Step 8: Set the Filters and Pull Invoices
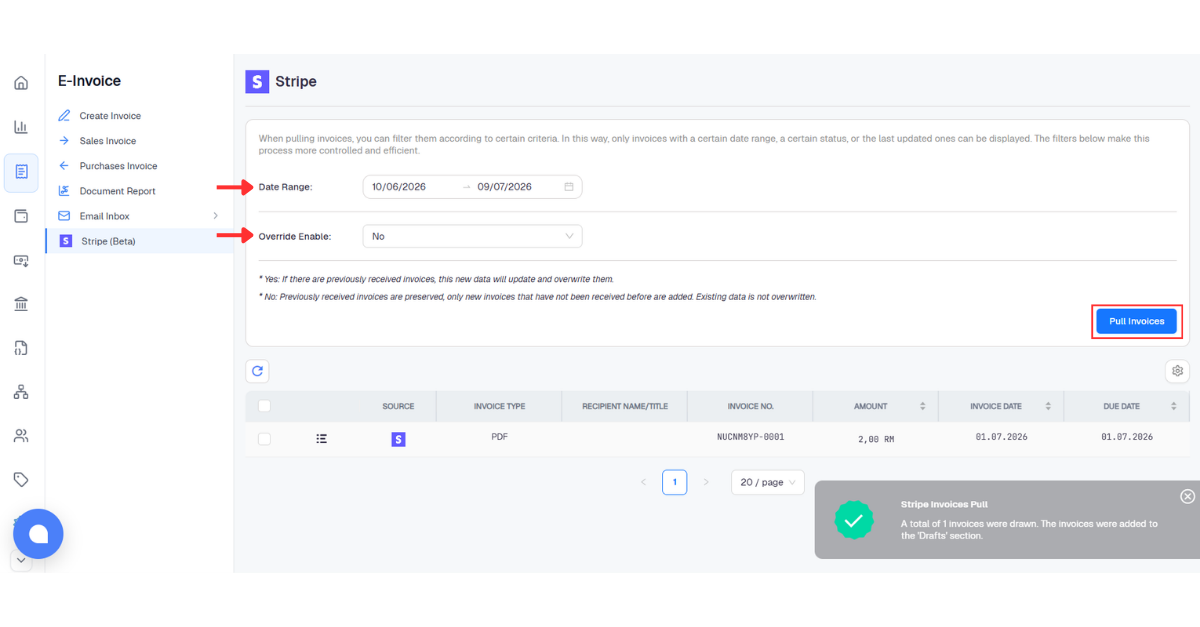
In the Date Range field, select the date range for the invoices to be pulled. If required, configure the Override Enable filter according to your business needs, and click the Pull Invoices button.
Creating an Invoice from an Invoice Pulled from Stripe
Step 9: Open the Invoice Record on the Edit Screen
On the screen where the pulled invoices are listed, find the relevant invoice row and click the Edit button on the left side of the row.
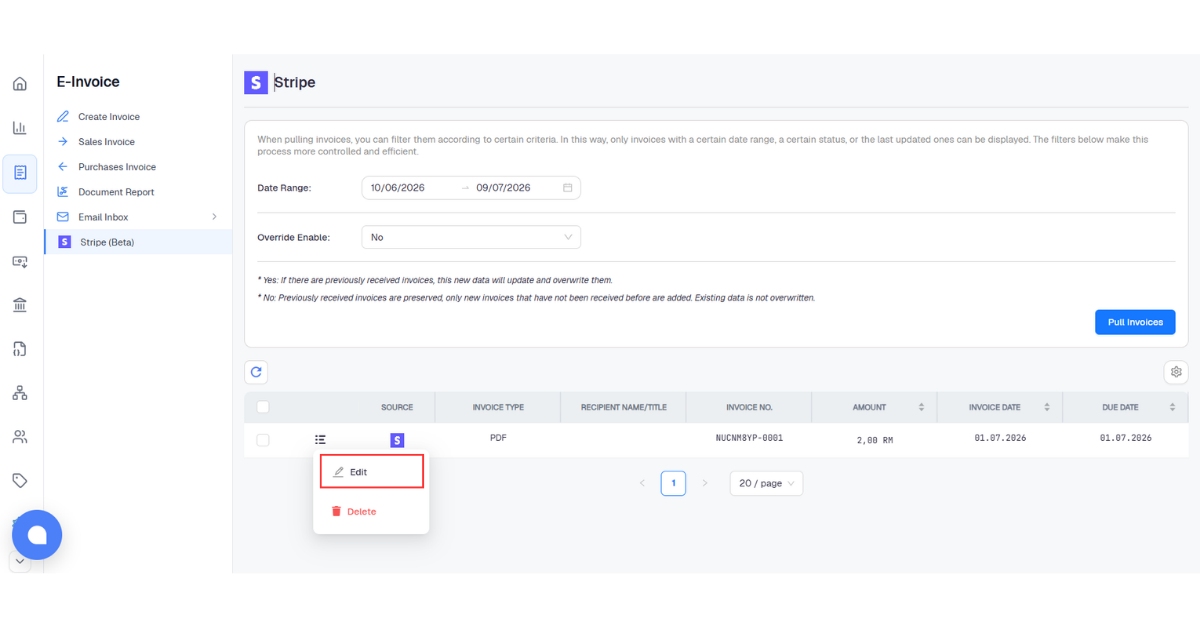
Step 10: Review the Invoice Form
In the invoice form that opens, review the information pulled from Stripe. The invoice received from Stripe is displayed in PDF format.
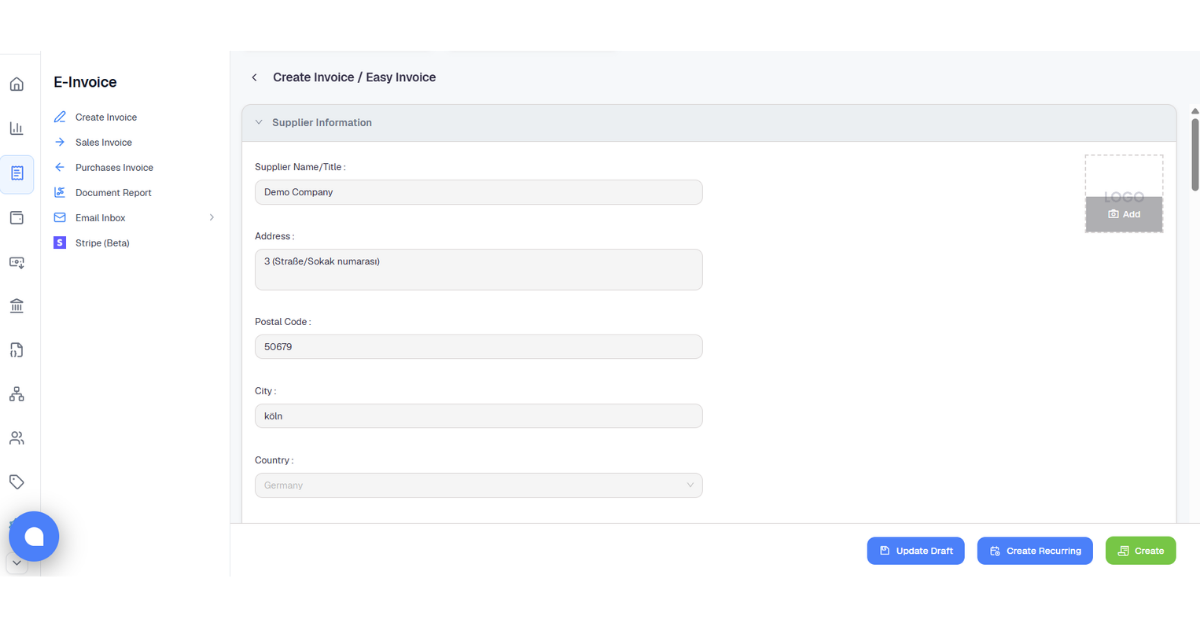
Step 11: Select the Invoice Type
Select the invoice type to be created from the Invoice Type section. With this selection, the invoice pulled from Stripe can be converted to the invoice type that meets your needs.
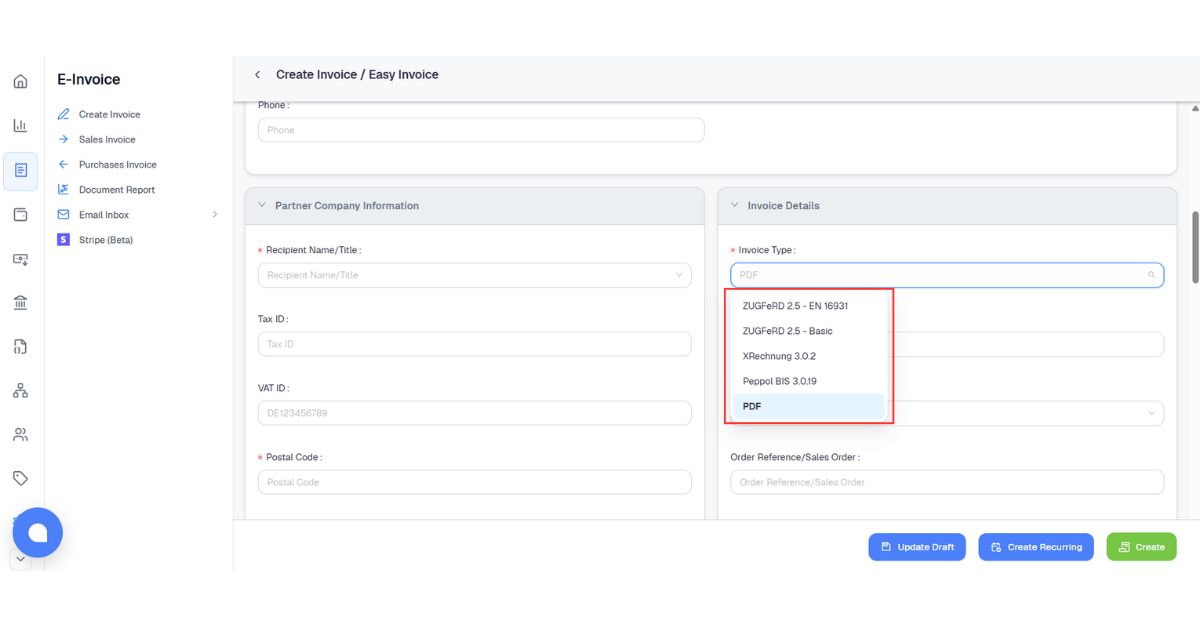
Step 12: Complete the Required Fields and Create the Invoice
Complete all required fields and other necessary information according to the selected invoice type. After checking all information, click the Create button.
Step 13: Verify the Created Invoice
When the invoice is created successfully, it is listed on the Sales Invoice page. Check that the Source field is Stripe and that the Invoice Type field matches the selected invoice type.
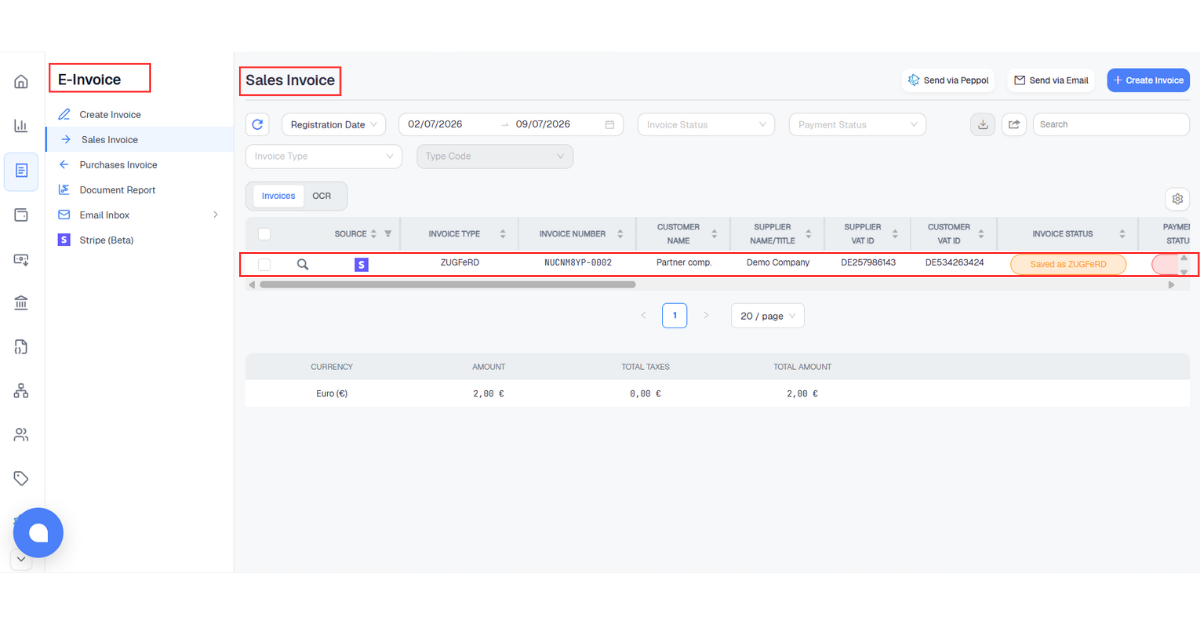
Result and Verification
After these steps are completed, the Stripe integration becomes active, Stripe invoices are pulled into the Docnova Portal, and an invoice record is created according to the selected Invoice Type.
- Check that the Stripe application status is Active on the Third-party Apps screen.
- After the Pull Invoices process, verify that the invoices are listed on the Stripe screen.
- After the invoice is created, check that the relevant record is displayed on the Sales Invoice page.
- If an error occurs, check user permissions, Stripe account information, and the integration status.